How to Build a Medaka Mini Pond
So you bought a big planter, and now it's staring at you. Good news: you are five steps and about two weeks away from a living patio pond, and none of the steps involve electricity. This is the exact recipe behind the seventeen pots on my deck, scaled to your first one.
Step 1: the container
Fifteen to twenty gallons is a sweet spot for a first mini pond: big enough to hold steady temperatures and forgive beginner mistakes, small enough to fit a patio corner. A resin planter with no drainage holes, a whiskey-barrel liner, or a plain stock tank all work. If your planter has drainage holes, plug them or add a liner. Deeper beats wider for summer stability, and dark interior colors show the fish off best from above.
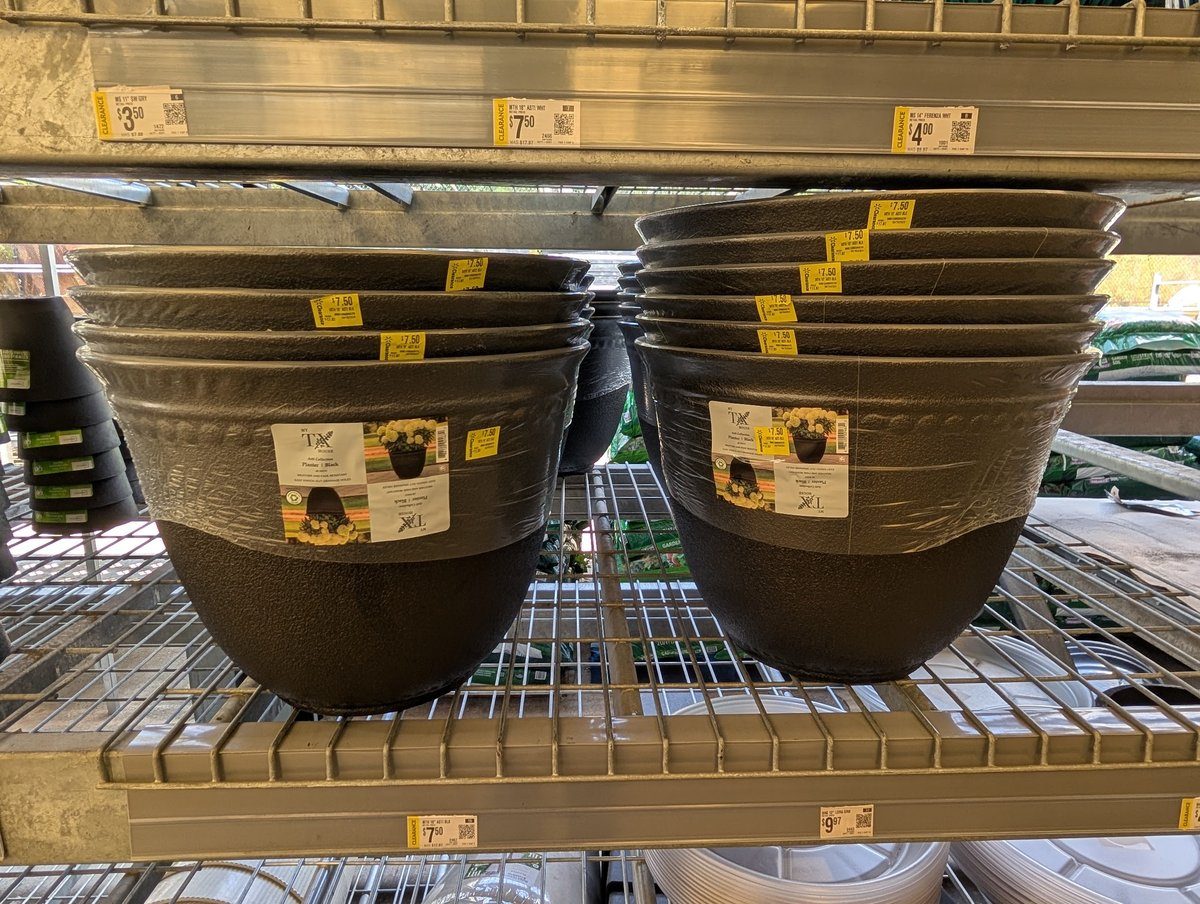
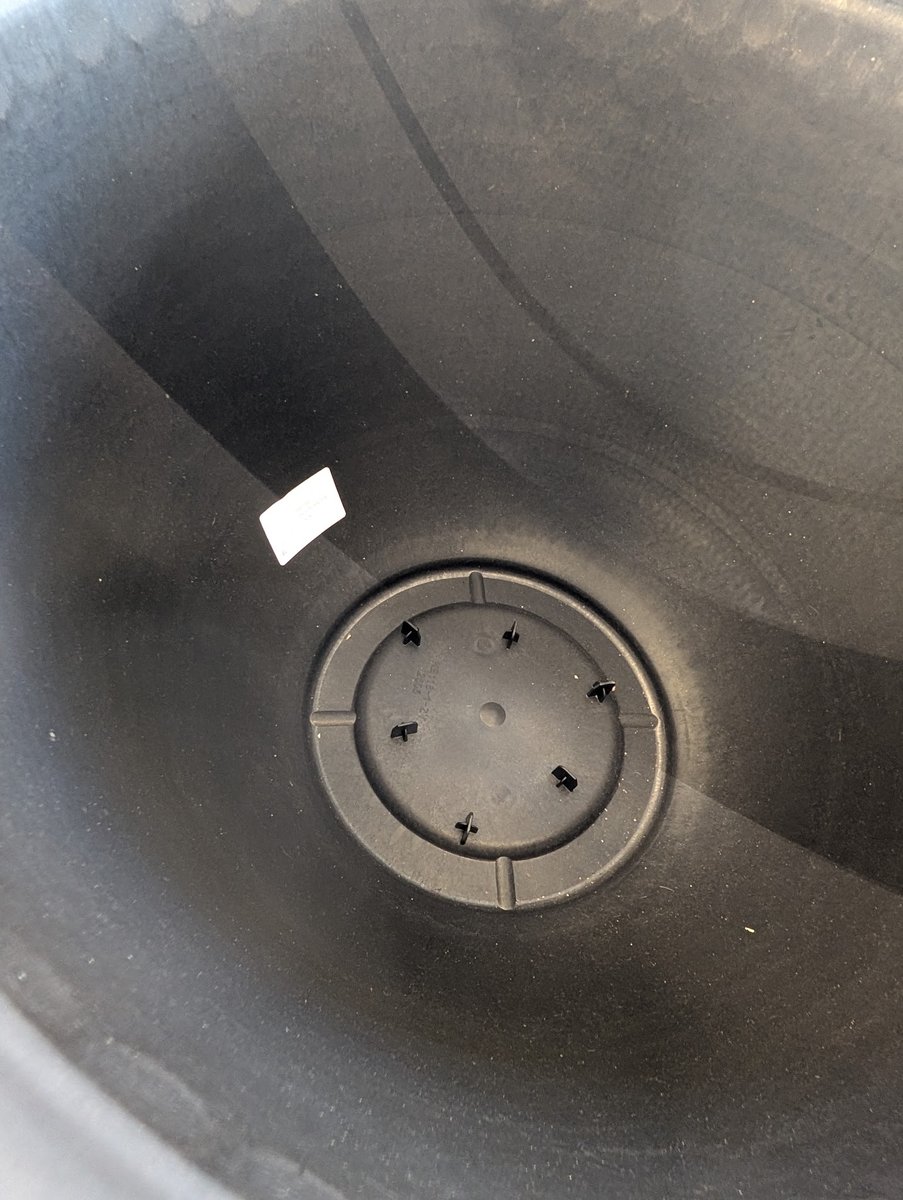
A shopping trick that saves real money: the garden section of any big-box store, especially late in the season. Look for resin planters where drainage is optional: instead of open holes, the bottom has molded drill markings, thin spots a gardener is meant to drill through. You just never pick up the drill, and the pot holds water out of the box, no plugging, no liner, no leaks. Pre-drilled pots can be sealed, but a bottom that was never opened beats a patched hole every time. I recently walked out of a big-box garden section with 18-inch planters like that for $7.50 apiece, down from $17.97, on end-of-season clearance. Sometimes this hobby rewards nothing more than being in the right place at the right time, and they're the same style of pot my own fish are raised in.
Where to put it: morning sun, afternoon shade if you can manage it. Sun grows the plants and lights up the fish; afternoon shade keeps July from cooking the water. Somewhere you walk past daily beats the prettiest far corner, because the pond you see is the pond you enjoy.
Step 2: the water
Fill it, then deal with chlorine. A cheap bottle of water conditioner neutralizes chlorine and chloramine instantly, or plain chlorine (not chloramine) gasses off if the water stands for a day or two. Either way, never add fish to fresh tap water. From then on, the pond mostly needs top-offs as water evaporates, always dechlorinated first. My water parameters guide covers what is actually in your tap water and how much it matters, which is less than you fear.
Step 3: the plants (these are your filter)
In a mini pond, live plants do the job a filter does in an aquarium: they take up the waste the fish produce. Two kinds matter. Floating plants, frogbit, salvinia, red root floaters (a few of these are restricted in some states, so check yours), shade the water, shelter fry, and grow fast enough to eat the nutrient load. Keep them to about two-thirds of the surface at most, here is why. Submerged plants, hornwort, anacharis where legal, java moss, work below the surface and give eggs and fry somewhere to hide. My submerged variety pack and floating variety pack are both built to start exactly this kind of pond, and every live fish order ships with free floaters anyway.
Step 4: the boring two weeks
Here is the step that separates ponds that thrive from ponds that struggle: after planting, wait about two weeks before adding fish. The water clears, the plants root and start growing, beneficial bacteria begin colonizing every surface (a full colony takes a month or more, which is why I stock lightly at first), and the little ecosystem finds its feet. A pinch of fish food tossed in once or twice during the wait gives the bacteria something to practice on. If the water turns green in the meantime, that is normal and nothing to fear.
Step 5: the fish
Start with three to six medaka in a 15 to 20 gallon container. They are social, they school loosely at the surface, and they breed readily, so your population grows on its own by midsummer. A build-your-own trio is a natural starter, and a trapdoor snail or two handles the cleanup crew role. When the box arrives, follow the acclimation guide, and leave a few inches between the waterline and the rim, because medaka jump.
What you can skip
No pump, no filter, no heater, no lights, no substrate. A planted, lightly stocked mini pond needs none of them, and medaka actively prefer the still water. If you want insurance for brutal summer weeks, a small air stone breaking the surface at night is the one upgrade worth considering, my quiet-losses guide explains the nighttime oxygen story. Bare bottoms are easier to clean; a thin sand cap is purely cosmetic. Spend the money on plants instead.
Keeping it going
Feed a pinch daily or most days, top off with dechlorinated water as it evaporates, thin the floaters when they pass two-thirds coverage, and enjoy it. Come autumn, read winterizing, and for the full year-round picture there is the outdoor keeping guide. That is genuinely the whole maintenance list!
Outdoor-raised medaka, floating and submerged plant packs, and trapdoor snails, all from one small North Carolina breeder, with free floating plants and the live arrival guarantee on every live order.
Create Your Starter TrioCommon questions
Do I need a pump or filter for a medaka mini pond?
Not in a planted, lightly stocked container. Live plants take up waste and handle the work a filter does, and medaka prefer still water. Keep at least a third of the surface open, stock lightly, and feed modestly. An air stone or small sponge filter is optional insurance in hot weather, not a requirement.
How many medaka can I put in a mini pond?
In a 15 to 20 gallon patio container, start with three to six adult medaka. They breed readily, so the population grows on its own. More volume is always more forgiving; ten gallons is the sensible minimum for a group.
Do medaka need substrate, sand, or gravel?
No. A bare bottom is the easiest to keep clean, and it is how my own pots run. If you like the look, a thin layer of sand or small gravel is harmless, and a couple of inches of plain soil capped with gravel lets you grow potted pond plants. Deep, dirty substrate is the one version to avoid, since uneaten food and waste sink into it and foul the water.
How much sun should a medaka mini pond get?
Morning sun with afternoon shade is the sweet spot. Sun powers the plants and brings out the fish's color, while afternoon shade keeps summer water temperatures in a comfortable range. All-day full sun in summer heat calls for more floating plant cover or a shadier spot.